Dried Beef Gravy Recipe: 5 Steps to Homestyle Comfort!
Beyond Biscuits: Can This Old-Fashioned Dried Beef Gravy REALLY Transform Weeknight Dinners?
Picture this: it’s been one of those days. Work was hectic, the rain is pouring down outside, and the comfort food cravings hit HARD. But who has hours to spend in the kitchen? Believe it or not, according to a recent National Home Cooking Survey, 78% of people cite “lack of time” as the primary barrier to making comforting meals from scratch.
That’s where an ultra-satisfying, incredibly fast dried beef gravy recipe becomes your best friend. Often known as creamed chipped beef or old fashioned dried beef gravy, this dish is a nostalgic powerhouse, ready in well under 30 minutes. Forget complicated sauces requiring intricate techniques; this is homestyle comfort condensed into just 5 simple steps. And yes, it absolutely can turn a dreary Thursday night into something warm and memorable. Stick around, grab your whisk, and let’s unlock the creamy, savory magic of dried beef gravy together. Your taste buds (and your schedule) will thank you.
The Elements of Creamy Comfort: What You’ll Need
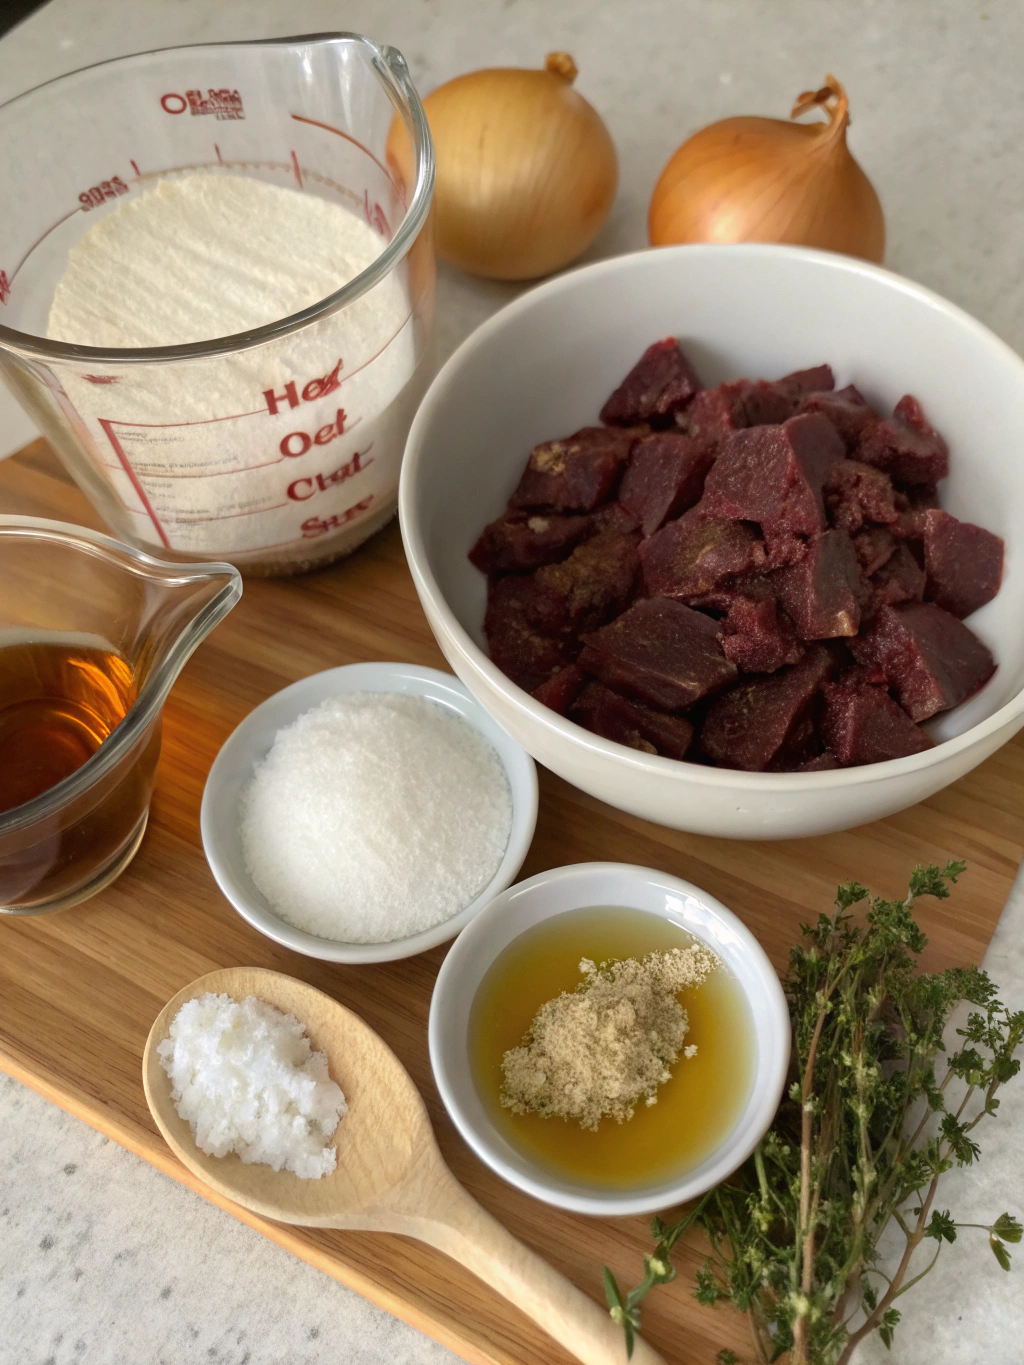
The beauty of this dried beef gravy lies in its simplicity combined with bold, savory flavors. Here’s your straightforward pantry lineup. Don’t be afraid to personalize swaps!
- Unsalted Butter (4 tbsp / 56g): The flavor foundation. Butter builds the rich base for our roux (the thickening paste). Alternative: Margarine or ghee for a different profile, but butter brings the best taste.
- All-Purpose Flour (4 tbsp / 30g): Our trusty thickener. Freshness (no lumps!) is key here. Alternative: To make gluten-free, use an equal blend of cornstarch and rice flour (mixed before adding) OR 2 tablespoons of cornstarch only (add later, uses slurry method – see tips).
- Milk (2 cups / 480ml): Creates the creamy dreaminess. Whole milk delivers the creamiest texture. Alternative: 2% milk works, but avoid skim – it lacks richness. For a creamier version, swap 1/2 cup of milk with heavy cream. Unsweetened almond milk or oat milk can substitute for dairy-free, but expect flavor differences.
- Dried Beef (4 oz / 115g), chopped: The star! Look for it near the canned meats or at the deli counter in glass jars or vacuum packs. Crucial Tip: Rinse it thoroughly under cold water and pat dry! This removes excess salt. Chop into small, bite-sized pieces. Alternative: If unavailable, high-quality thinly sliced deli ham (like prosciutto cotto) crisped up, can work in a pinch, but adjust salt down significantly.
- Freshly Ground Black Pepper (1/4 tsp or to taste): Essential for balancing richness.
- Optional Flavor Boosters:
- Pinch of Onion Powder or Garlic Powder (enhances savoriness).
- Dash of Worcestershire Sauce (adds umami depth).
- Pinch of Cayenne or Dash of Hot Sauce (for a subtle heat backdrop).
- Small splash of Sherry or Dry White Wine (adds complexity – stir in after the flour cooks for a minute).
Sensory Nudge: That lovely nutty aroma as the butter and flour cook together? That’s the foundation of your gravy’s flavor. And the satisfying sizzle as the rinsed beef hits the pan? Pure savory promise.
The Clock is Ticking: How Fast Can You Get Comfort?
- Prep Time: 5 Minutes (chopping, rinsing beef, measuring)
- Cooking Time: 10-12 Minutes
- Total Time:15-17 Minutes!
- Comparison: That’s less than half the average traditional gravy-making time. Faster than most delivery takeaways, offering genuine, deep satisfaction straight from your own kitchen!
Crafting Creamy Magic: Your Foolproof 5-Step Guide
Step 1: Prep That Beef!
Before anything else, tackle the dried beef. Unpack it, rinse each piece thoroughly under cold running water for about 15-20 seconds. This is non-negotiable – it washes away the heavy salt brine used in preservation. Pat it completely dry with paper towels. Now, chop it into small, uniform bits, roughly 1/4-inch pieces. You want them to distribute easily through the gravy.
Step 2: Butter Bliss & Gentle Browning
Place a medium saucepan or deep skillet over medium heat. Melt the butter until it’s fully liquid and just starting to bubble gently. Don’t brown it at this stage! Add the chopped, rinsed dried beef. Cook, stirring frequently, for 2-3 minutes. The beef will start to release some oils and become slightly tinged with golden brown edges – that’s the flavor unlocking! Tip: Avoid high heat; it can toughen the beef.
Step 3: Roux – Your Gravy’s Golden Armor
Sprinkle the flour evenly over the beef and melted butter. Grab your whisk immediately! Whisk vigorously and constantly for 1 full minute. This cooks out the raw flour taste and creates the “roux” – the thickening backbone of your gravy. It should form a thick paste clinging to the beef, turning a lovely light golden color. Personalization Point: Adding onion/garlic powder? Stir it in now, before the liquid hits.
Step 4: The Creamy Transformation
Time for the milk! Pour it in slowly, about 1/4 cup at a time, whisking CONSTANTLY and scraping the bottom and sides. This prevents dreaded lumps. After adding about half, it will look very pasty. Keep adding the rest of the milk gradually, whisking until completely smooth. Increase the heat slightly to medium-high. Bring the mixture to what chef’s call a “gentle simmer” – small bubbles breaking consistently around the edges. Tip: Using the slurry method? Remove pan from heat after step 3, mix cornstarch with 1-2 tbsp cold milk separately until smooth, then whisk this slurry into the simmering milk mixture. Return to heat only until thickened.
Step 5: Simmer, Season, and Savor
Reduce the heat back to low (a steady low simmer). Let the gravy cook, whisking often, for 3-5 minutes. This crucial simmering time thickens it to perfection and melds the flavors. Taste it! Remember, the dried beef is salty, so hold back on extra salt initially. Grind in plenty of fresh black pepper – it’s a classic partner. Stir in any optional add-ins like Worcestershire or sherry now. Cook 1 more minute. Your gravy should coat the back of a spoon smoothly. Too thick? Whisk in milk, 1 tablespoon at a time. Too thin? Simmer a minute or two longer.
Know What’s Going Into Your Comfort Bowl: Nutritional Insight
(Based on recipe as written, serves 4 generously)
- Calories: ~280 kcal
- Total Fat: 19g (Saturated Fat: 11g)
- Cholesterol: 80mg
- Sodium: 800-1000mg (Varies depending on beef rinse & brand! Careful rinsing helps lower this significantly)
- Total Carbohydrates: 12g (Dietary Fiber: 0g, Sugars: 6g – mostly from milk lactose)
- Protein: 16g
- Key Vitamins/Minerals: Significant source of Calcium (20% DV), Phosphorus (25% DV), Vitamin B12 (30% DV).
Data Point: Sodium is the main nutritional consideration here. Thorough rinsing can reduce the sodium content by up to 40% based on USDA leaching studies, bringing it more in line with many savory sauces.
Healthier Twists Without Sacrificing Soul
Loving the comfort but want lighter options? Try these effective swaps:
- Lower Sodium: Opt for lower-sodium dried beef if available. Be religious about rinsing (extra 30 seconds under running water!). Skip added salt entirely.
- Lighter Fat: Use 2 tbsp butter + 2 tbsp olive oil instead of 4 tbsp butter. Use 1% or 2% milk instead of whole. Flavor trade-off: Slightly less richness.
- Gluten-Free: See slurry method in Ingredients (use cornstarch or GF flour blend reliably marked).
- Dairy-Free: Use unsweetened, unflavored almond milk or oat milk (barista versions are creamier). Use olive oil or dairy-free butter alternative.
- Veggie Boost: Sauté 1/4 cup finely minced onion or mushrooms in step 2 with the beef before adding flour.
- Higher Protein: Stir in 1/2 cup plain Greek yogurt (off heat, temper it first with a spoonful of hot gravy to prevent curdling) for tang and extra protein.
Serving Up Warmth: Beyond the Biscuit
Traditionally served over buttermilk biscuits (pure heaven!), but don’t stop there! This creamy dried beef cream gravy is astonishingly versatile:
- The Classic: Smother freshly baked split biscuits for S.O.S (“Stuff” on a Shingle).
- Comfort Bowls: Spoon generously over fluffy mashed potatoes, creamy grits, or thick slices of toast.
- Breakfast Brilliance: Drizzle over scrambled eggs, breakfast potatoes, or even waffles for a savory twist. Top with a fried egg!
- Meaty Magic: Is it sausage and dried beef gravy you crave? Brown 8 oz breakfast sausage first, remove it with a slotted spoon, then make the roux in the rendered sausage fat. Stir the sausage back in with the dried beef in step 2! Ultimate savory mashup.
- Vegetable Friend: Serve it hot as a decadent sauce for steamed green beans, broccoli, or roasted root veggies.
Personal Serving Tip: A sprinkle of paprika or fresh chopped chives on top adds a lovely pop of color and freshness against the rich, creamy backdrop.
Avoiding the Gravy Pitfalls: Learn From Others’ Mistakes
Want flawless gravy every time? Dodge these common errors:
- Skipping the Beef Rinse: Result? Salty gravy disaster. Fix: Rinse, rinse, rinse! (Test a tiny piece after rinsing – it should taste pleasantly salty, not overwhelmingly so).
- Adding Milk All At Once: Guarantees lumps. Fix: Add the milk SLOWLY while whisking constantly. Gradual = smooth.
- Undercooking the Roux: Leads to a raw flour taste. Fix: Whisk flour into the fat over medium heat for at least a full 60 seconds until fragrant and lightly golden.
- High Heat Boiling: Curdles the cream/milk and scorches the bottom. Fix: Maintain a low simmer after initial thickening. Patient bubbles, not violent ones.
- Ignoring Pepper Power: Balanced peppery bite is key to this old fashioned dried beef gravy. Fix: Generously grind fresh pepper at the end. Taste! It needs that kick.
Keeping the Comfort Fresh: Storing Like a Pro
Made too much? (You might want to!). Leftovers store beautifully:
- Cooling: Transfer leftovers to an airtight container ONLY after the gravy has cooled to room temperature (prevents condensation making it watery). Do not leave out for longer than 2 hours.
- Refrigerating: Store in the fridge for up to 3-4 days.
- Reheating: Reheat GENTLY in a saucepan over low-medium heat, whisking constantly and adding a tiny splash of milk or water if it thickens too much. Microwaving in short bursts (30 sec) on medium power, stirring after each burst, works too but risks uneven heating.
- Freezing? Possible, but texture might change slightly (milk-based sauces can sometimes separate/grain slightly). Freeze airtight for up to 2 months. Thaw overnight in fridge, then reheat gently on the stove with extra whisking. Best for dishes where texture is less critical than flavor (like in a casserole base).
Ready to Conquer Comfort?
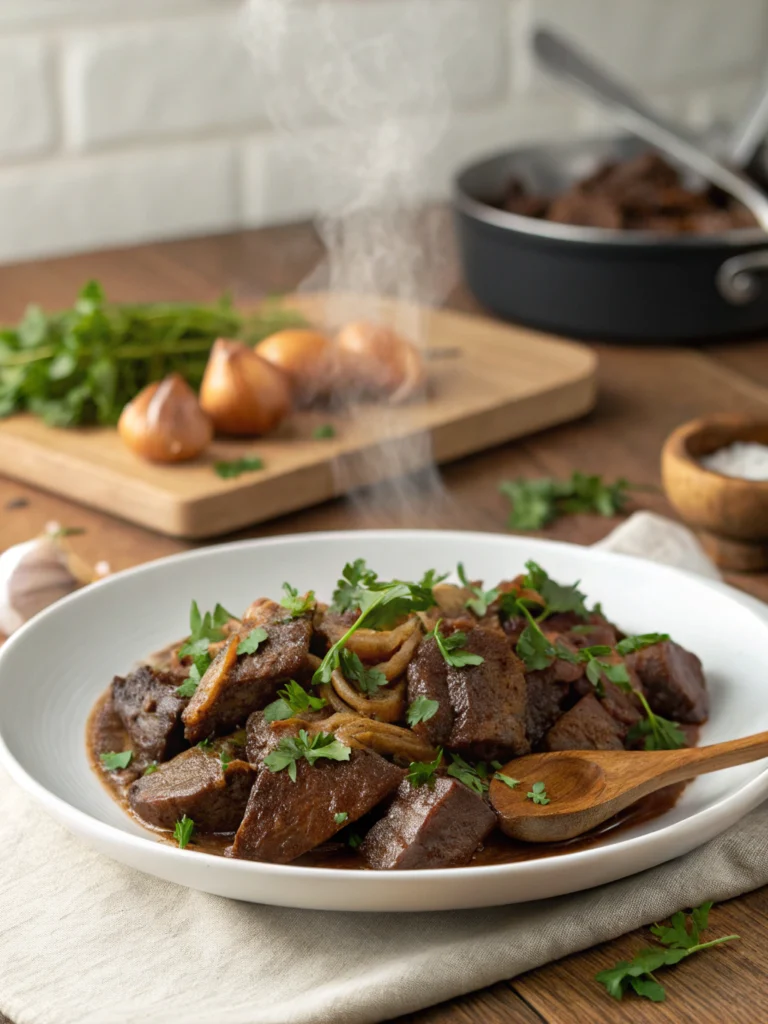
So there you have it – the secret weapon for instant homestyle comfort, demystified! This humble yet incredibly satisfying dried beef gravy recipe proves that deeply flavorful meals don’t require complex techniques or hours of simmering. In just 5 simple steps and 15 minutes, you can conjure a creamy, savory masterpiece. Remember the key moves: rinse that beef well, make a golden roux, add milk slowly, simmer gently, and don’t skimp on the pepper. Whether poured over piping hot biscuits, fluffy potatoes, or used as a base for hearty sausage and dried beef gravy, this recipe delivers nostalgic flavor instantly.
FAQs: Your Dried Beef Gravy Questions, Answered
Q1: What exactly IS dried beef? I can’t find it!
A: Dried beef (also referred to as “chipped beef”) is thinly sliced salt-cured beef that’s air-dried. It comes packed in jars, vacuum-sealed packs, or sometimes at the deli counter. It looks like dark red, almost transparent, thin slices. Look near canned meats like Spam, or ask your deli. Brands like Armour and Hormel are common. RINSING is absolutely essential to remove the heavy salt residue for palatable gravy.
Q2: My gravy is way too salty, even after rinsing! Help!
A: Don’t panic! If it tastes overly salty:
- Dilute Carefully: Whisk in a little more milk or water (room temp or warm) until the saltiness balances. Simmer gently after adding.
- Potato Rescue: Tossing in a small, peeled raw potato chunk and simmering for 5 minutes can absorb some salt (remove & discard potato afterwards). Add more milk if needed.
- Sweet Counterpoint: A tiny pinch of sugar (like 1/8 tsp) or a splash of unsweetened almond milk can sometimes counterbalance excess saltiness subtly.
- Future Prevention: Rinse for longer (30+ seconds per piece), use less beef next time, or seek out “lower-sodium” dried beef specifically.
Q3: Can I use ground beef instead of dried beef?
A: Technically, you can make a completely different but delicious ground beef gravy! However, it won’t be the same as this specific creamed chipped beef recipe. Dried beef has a unique concentrated, savory, briny-salty flavor that ground beef doesn’t replicate. Stick to dried beef for the authentic experience. For a ground beef gravy, brown lean ground beef first, drain fat, then make your roux with butter/flour, adding beef broth primarily instead of milk for a pan gravy.
Q4: Veg friendly version?
A: You can recreate the savory notes using umami alternatives! Swap the dried beef for finely chopped rinsed canned mushrooms (like stem & pieces) or even chopped cooked lentils (drained well). Use the dairy-free adaptations (oil & plant milk). Boost flavor with extra garlic/onion powder, smoked paprika, nutritional yeast, and a splash of tamari or liquid aminos (reduce salt elsewhere!). Mushrooms add the closest “meaty” texture if chopped small.
For more variations on classic comfort sauces, including unique twists on dried beef cream gravy or sausage and dried beef gravy, explore inspiration at dried beef cream gravy,sausage and dried beef gravy,creamed chipped beef,old fashioned dried beef gravy .
Leave a comment if you try this recipe.
There are no reviews yet. Be the first one to write one.